


Celebrate spring with pressed flowers
April 21, 2021
Spring is here! As beautiful flowers are in bloom, this is the perfect opportunity to revive the dying art form of pressed flowers and add the perfect artistic touch to your home decorations or gifts. Pressing flowers is a simple art, with its origins being from ancient Egypt. It became a popular pastime for women during the Victorian era in England. Follow the steps below to learn how you can properly press flowers:
Step one: Preparing the flowers
When picking flowers outside, there are a few important things to take note of. Though you can choose essentially any type of flower, flat flowers will make the process easier. For flowers with dome-shaped centers, you can trim the tips to make them flatter.
Keep in mind what kind of composition you want, and pick an abundance of flowers so that you have more choices. When searching for the perfect combination, try to vary the size, shape and color of the flowers. To add more variety, you can also collect other plants like clovers or leaves with interesting shapes. Pick the flowers with the brightest colors because by the end of the pressing process, dried flowers tend to pale.
Once you have all of your flowers, you can prepare them by cutting the stems shorter and washing the dirt off with water. After trimming, keep them fresh by putting them in the refrigerator if you are not pressing them right away.
Step two: Pressing the flowers
This step has two options: using a book and using a microwave.
Option one: Using a book
First, place a piece of absorbent paper between the pages of a book. Keep the paper flat, and set your flowers on the piece of absorbent paper. Be careful to not wrinkle or fold your flowers. As the flowers are pressed, moisture will seep out. Keep each flower spaced out to prevent moisture from being soaked in by the adjacent flower. Carefully place another piece of absorbent paper over it, and close the book.
Keep the book in a safe place where you will not easily knock it over. It is recommended to add more weighted items, such as books or other heavy objects, on top to press the flowers more firmly. Press the flowers for around two weeks, then carefully open the book and take out the flowers. They will be delicate and paper-like, so use tweezers or carefully use your fingers to remove them from the book.
Option two: Using a microwave
This technique will save you more time than the book technique. Place the flowers on a piece of parchment paper. As in the book technique, arrange them so that they are spaced out, so moisture from the flowers does not seep into other flowers as they dry. Place another piece of paper and then a flat heavy object on top. You can also place the flowers in a book before placing them in the microwave.
Microwave your flowers for 30 seconds at a time. If you use this technique, make sure that there are no scrap metal bits on your book — check for staples in the book binding. You can split the flowers into two groups, microwaving one group while waiting for the second to cool and alternating the groups.
Once the flowers are dry, keep the flowers pressed inside the book or under a heavy object for two days. After two days, the flowers will be ready.
Step three: Decorating
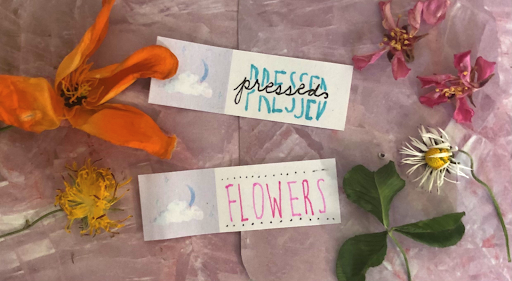
Get creative! Arrange your pressed flowers in a composition you like. They can be used to create bookmarks, picture frames, phone cases and more.
For picture frames, you can use glass or clear glue. For other crafts like bookmarks, you can laminate or simply cover them in clear tape. The options are flexible — the sealing of the flowers depends on what product you want to make.
Good luck pressing your flowers!